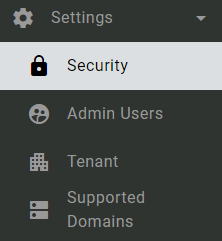
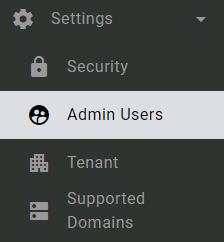
The Settings option displays a list of SCP settings and provides a number of administrative actions for them. These include [View Image]:
- Security
- Admin Users
- Tenant
- Supported Domains
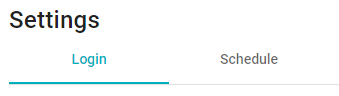
There are two areas of the Settings Page, Login and Schedule [View Image].
- Login covers device login settings
- Schedule covers Job Retention settings
Security
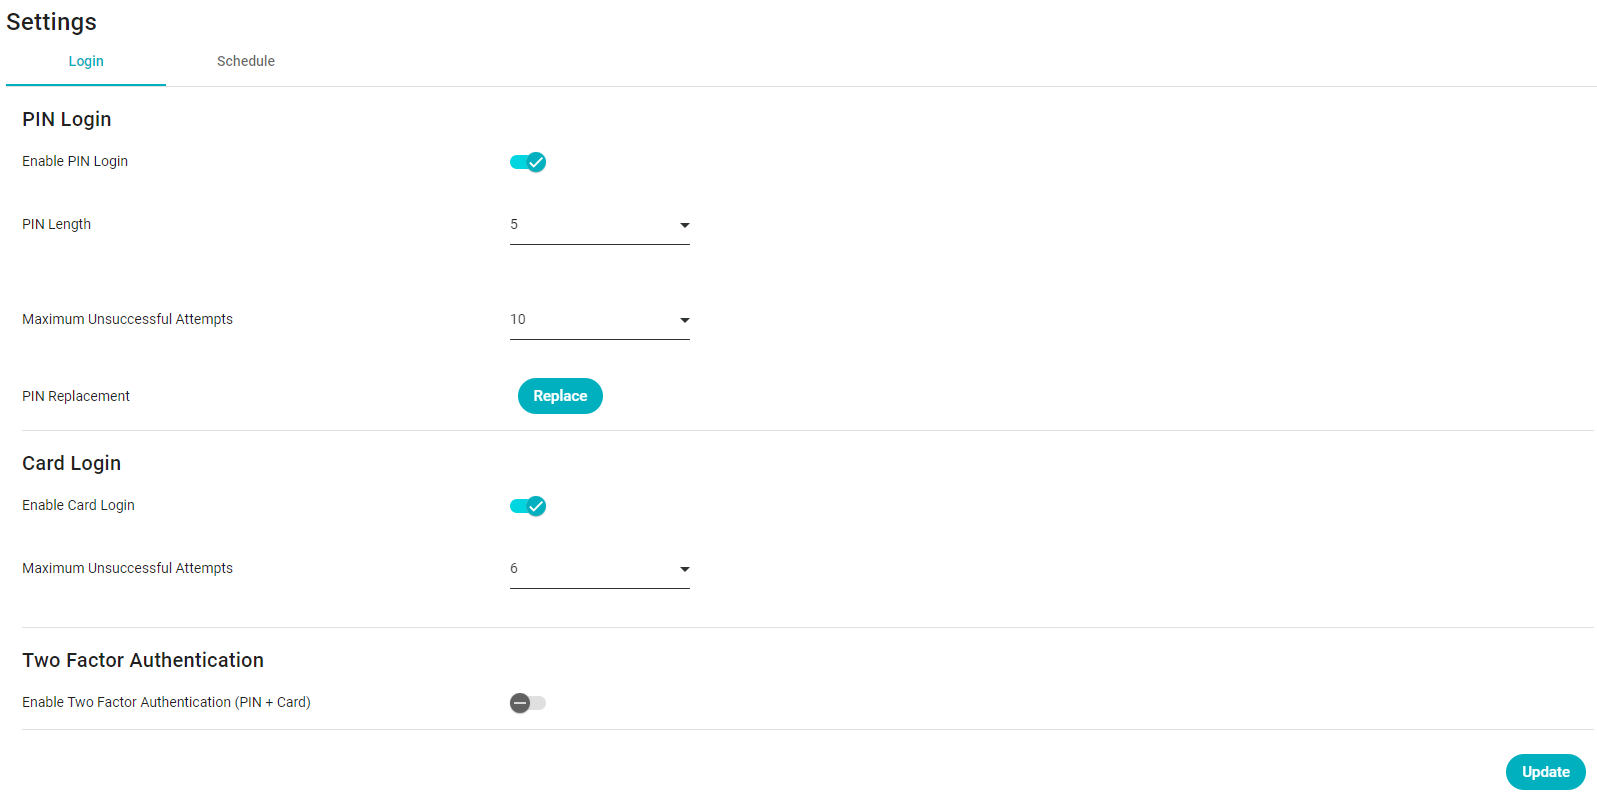
The Security tab is where Device login and job handling options are managed [View Image].
From this page you can manage:
- PIN Login
- Card Login
- Two Factor Authentication
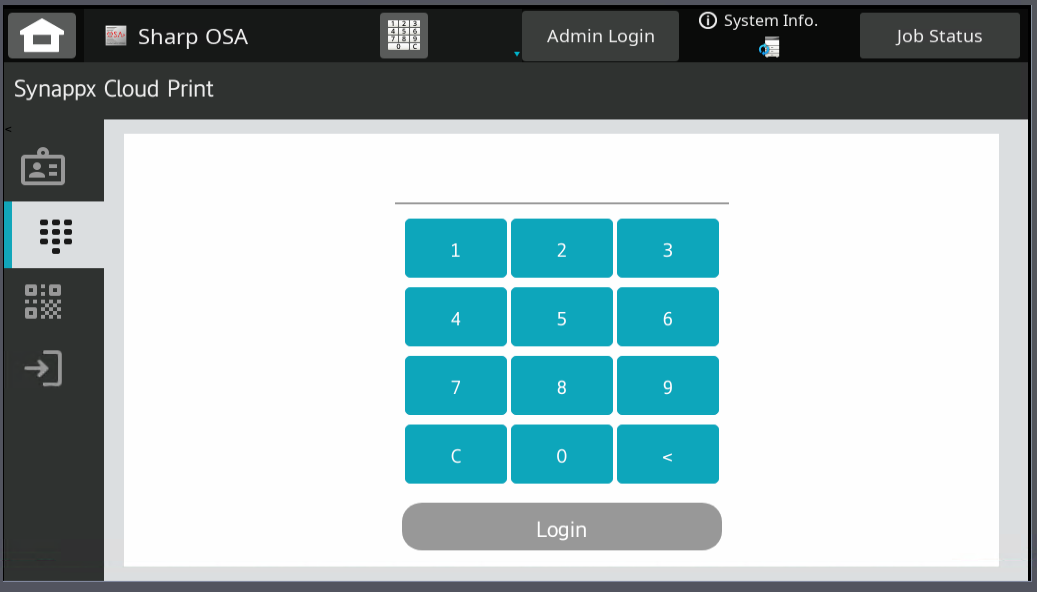
PIN Login
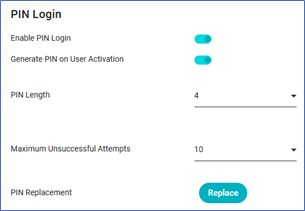
When pin login is enabled, users are able to login to the device using a pin number [View Image].
PIN length can be set from 4 to 6 numbers.
Maximum Unsuccessful attempts can be set from 1 to 10.
PIN Replacement can be used by current logged in user to change their Pin number.
MFP Screen with Pin Login Enabled [View Image].
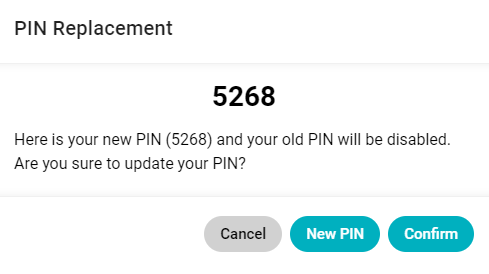
Clicking the PIN Replacement button will give the logged in user a choice of up to five different randomly generated PIN numbers [View Image].
If the number shown is not acceptable the New PIN button can be used to select another PIN, (up to five tries).
Clicking Confirm will confirm that PIN number for the admin / user.
Card Login
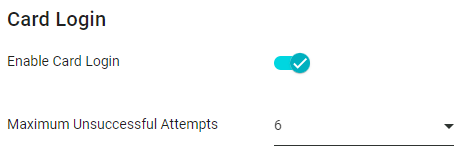
Enabling Card Login will allow users to register and login to the device/s with swipe cards [View Image].
Maximum Unsuccessful Attempts can be set from 1 to 10.
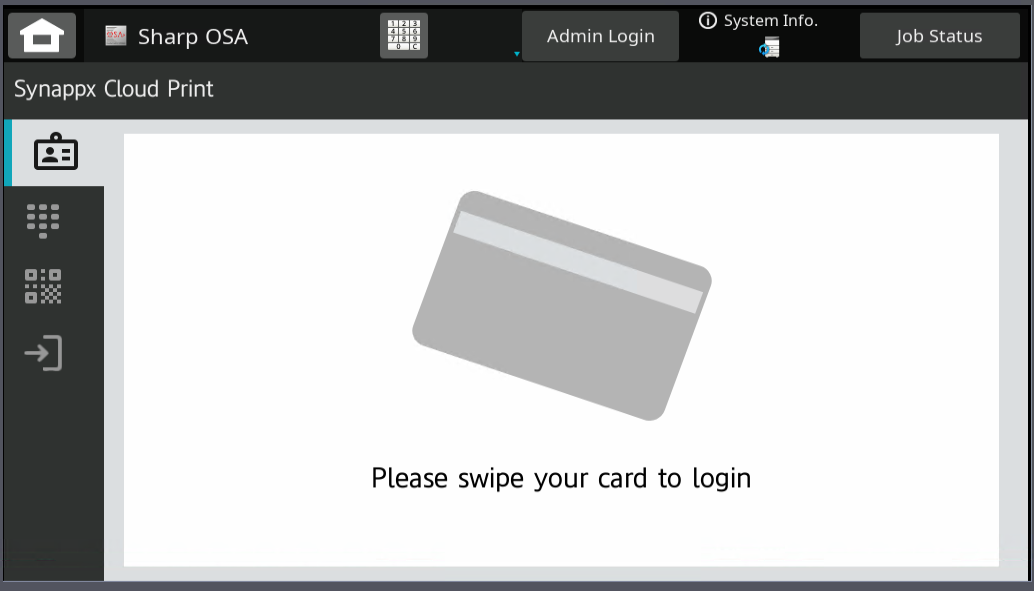
MFP Screen with Card Login enabled [View Image].
Two Factor Authentication
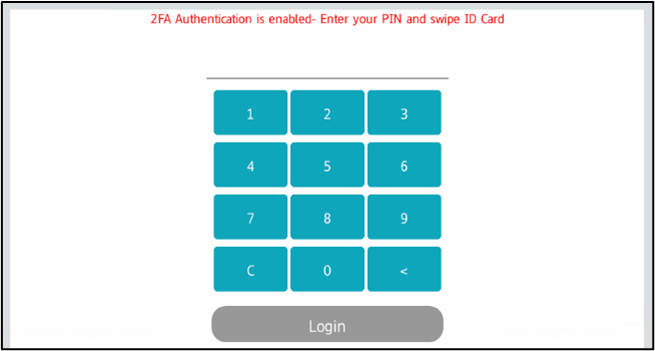
Enabling Two Factor Authentication will require users to login to the MFP using their PIN and Card swipe [View Image].
Any change on the Security page will require the Update button to be clicked to save the changes [View Image].
Once Two Factor Authentication is enabled, the login screen defaults to PIN code entry and users will be informed that they need to enter a PIN and then swipe their ID Card [View Image]
Settings – Schedule
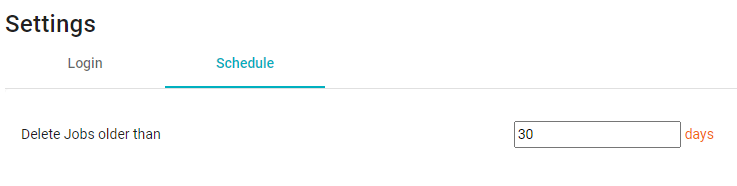
Under the Settings – Schedule tab is the setting for Job Retention [View Image].
The setting Delete Jobs Older Than can be set from 1 to 365 days. Any jobs older that the set number of days will be automatically deleted. Jobs are deleted at midnight on the qualifying day.
When the setting is changed, the Update button must be clicked to save the change [View Image].
Note: Any changes made in the settings – Security pages will affect ALL Devices.
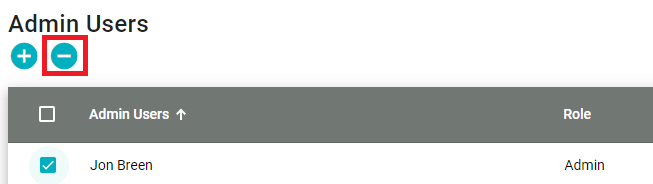
Admin Users
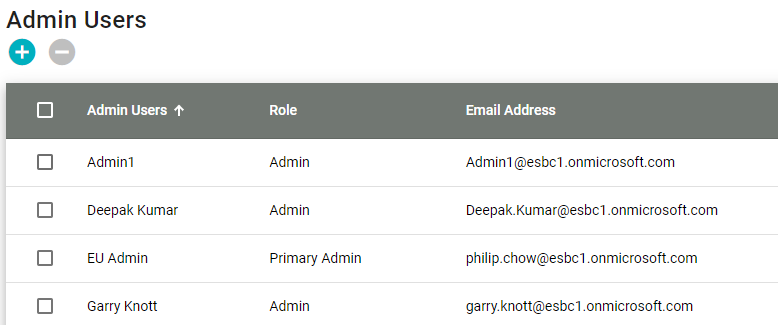
Admin user management is managed from Settings – Admin Users [View Image].
From here you are able to add an existing user as an Admin for the Portal [View Image].
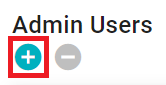
To add an Admin, click the + button [View Image].
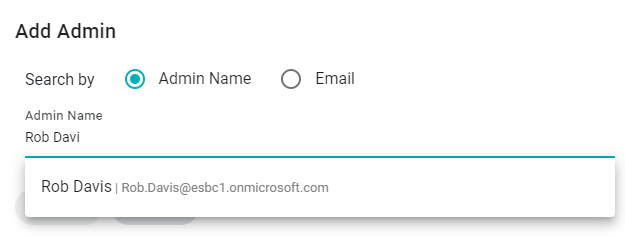
Users can be searched by Username or Email address [View Image].
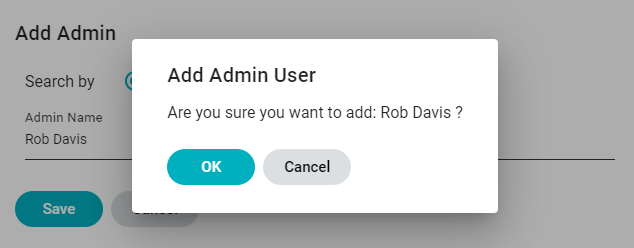
When selected, clicking Save will bring up a confirmation box [View Image].
Clicking OK will add that user as an Admin for the Portal [View Image].
The selected user will now show in the list of Portal Admins [View Image].
![View Image]](/sites/default/files/2023-10/Settings%20%2818%29.png)
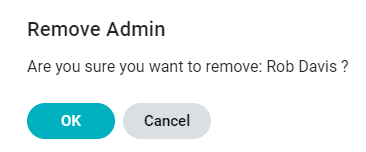
To remove an Admin from Admin Users click the trash can button next to the admin name [View Image][View Image].
This can also be achieved by selecting the admin check box and then using the [-] button [View Image].
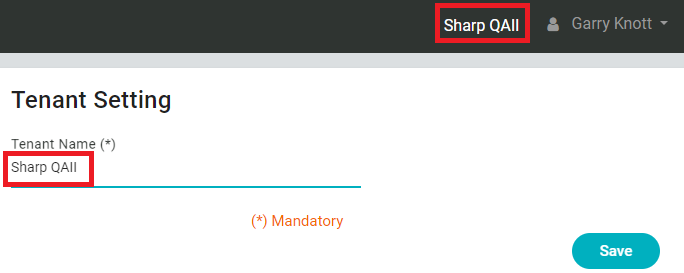
Tenant
The Tenant area of [Settings] currently displays the current saved Company Tenant [View Image].
This can be changed and saved, and will then be displayed on all Admin portal screens next to the logged in User/Admin name [View Image].
Supported Domains
This area lists all of your supported Domains [View Image].