Note: If the MFP you are setting up does not appear in the Synappx Cloud Print Portal – Devices list, you will receive an Error 500 message when trying to connect the MFP to the service
Minimum MFP Requirements:
- A Sharp Group 1 MFP running OSA version 5.5 or above
- EAM (AMX3) key installed
Input the IP address of the MFP into a web browser to navigate to the configuration page of the MFP. The default Username and password is admin.
Step 1. Security Settings
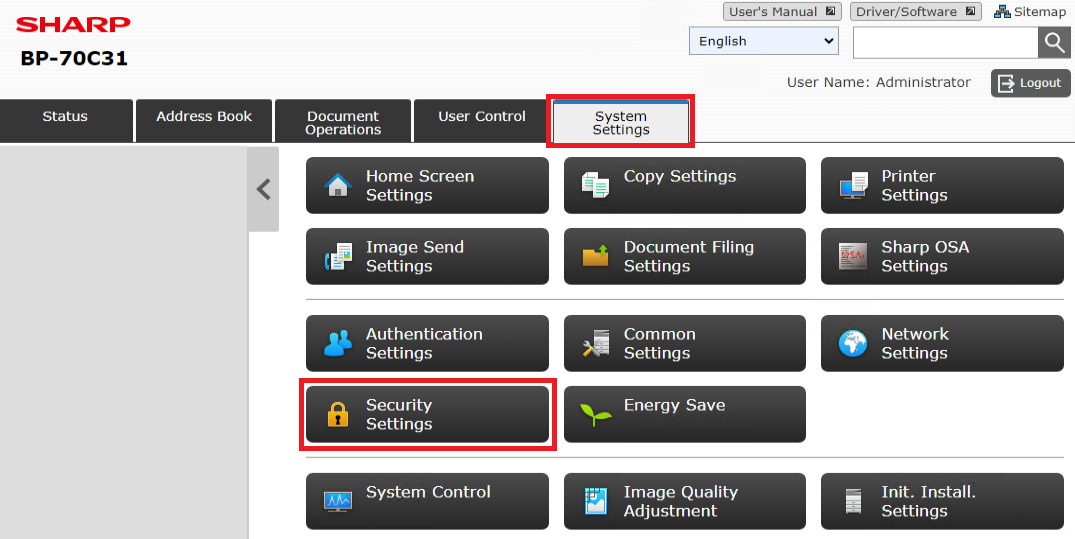
Go to System Settings then Security Settings [View Image].
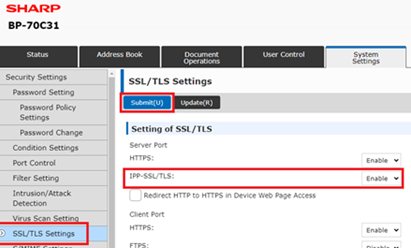
Select SSL/TLS Settings in the left-hand menu bar, change IPP-SSL/TLS setting is set to Enable then select Submit and Reboot [View Image].
Step 2. Active Directory Settings
Once Rebooted, Go to System Settings then Network Settings then Active Directory
Ensure that Domain Name is blank [View Image].
Step 3. Standard OSA Settings
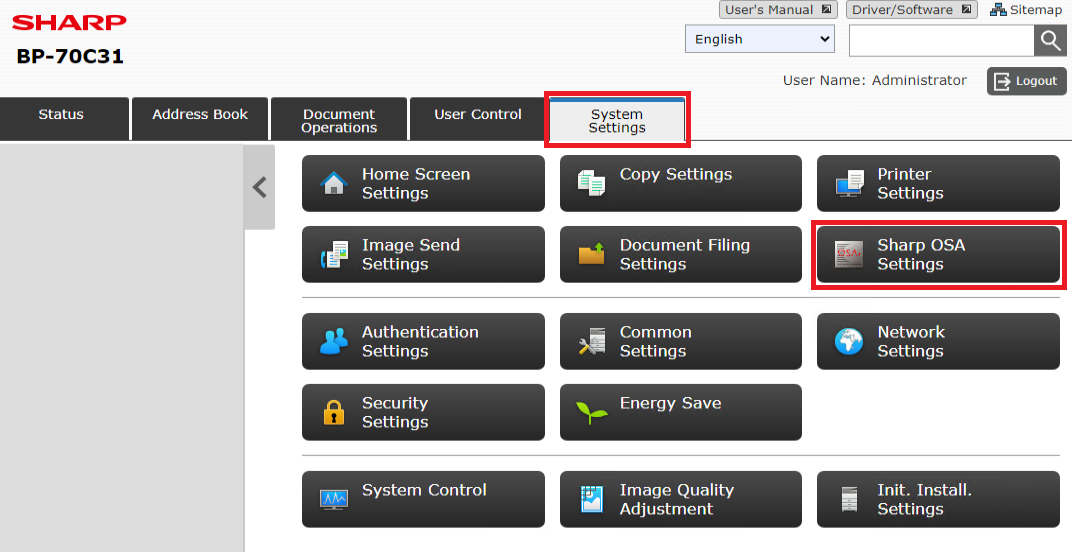
Click on the System Settings tab and select Sharp OSA Settings [View Image].
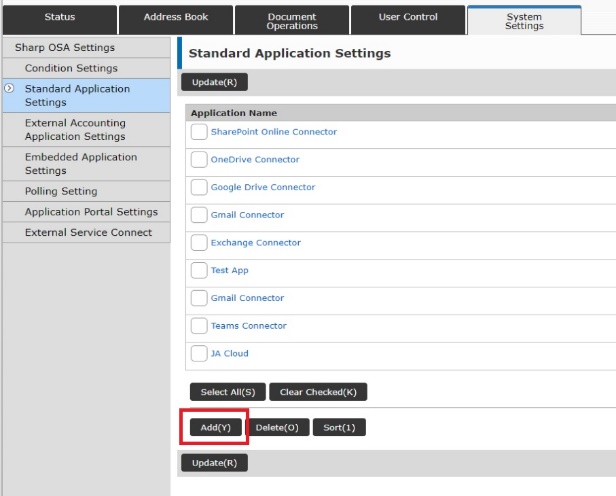
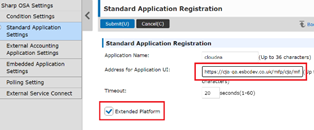
Click Standard Application Settings then Add [View Image][View Image].
Enter the following information:
- Application name: Synappx Cloud Print
- Address for Application UI: https://cloudprint.synappx.sharp.eu/mfp/home.jsp
- Check the ‘Extended Platform’ box.
- Click Submit
(this can be placed anywhere in the list of Standard Applications)
Step 4. External Accounting Application Settings
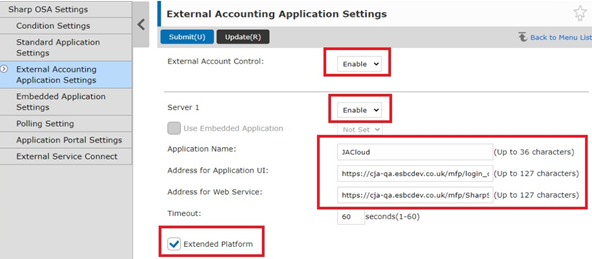
Now go to External Accounting Application Settings [View Image]:
Enter the following information:
- External Account Control: Enable
- Server 1: Enable
- Application name: Synappx Cloud Print
- Address for Application UI: https://cloudprint.synappx.sharp.eu/mfp/login_credentials.jsp
Address for Web Service: https://cloudprint.synappx.sharp.eu/mfp/SharpService - Check the ‘Extended Platform’ box.
- Click Submit
- Click Reboot Now
The MFP will now reboot
Step 5. Authentication Settings
Go back into the MFP Admin web pages
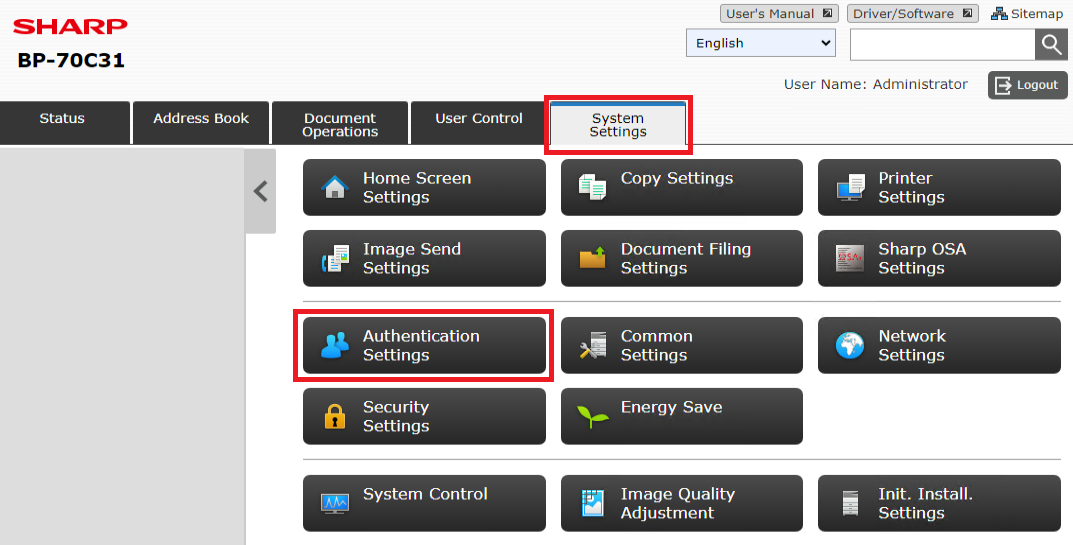
Go to System Settings then Authentication Settings [View Image].
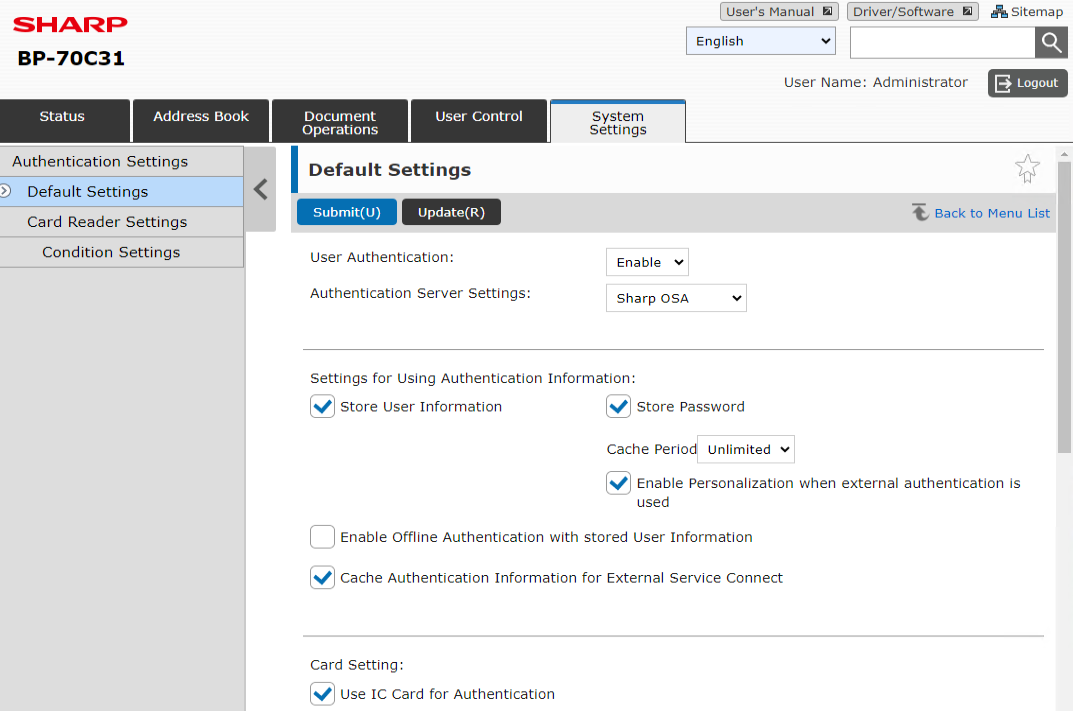
Enter the following information [View Image]:
- User Authentication: Enable
- Authentication Server Settings: SHARP OSA
- If a card reader is fitted check the ‘Use IC Card for Authentication’ box
- Click Submit
- Click OK
The MFP will reboot
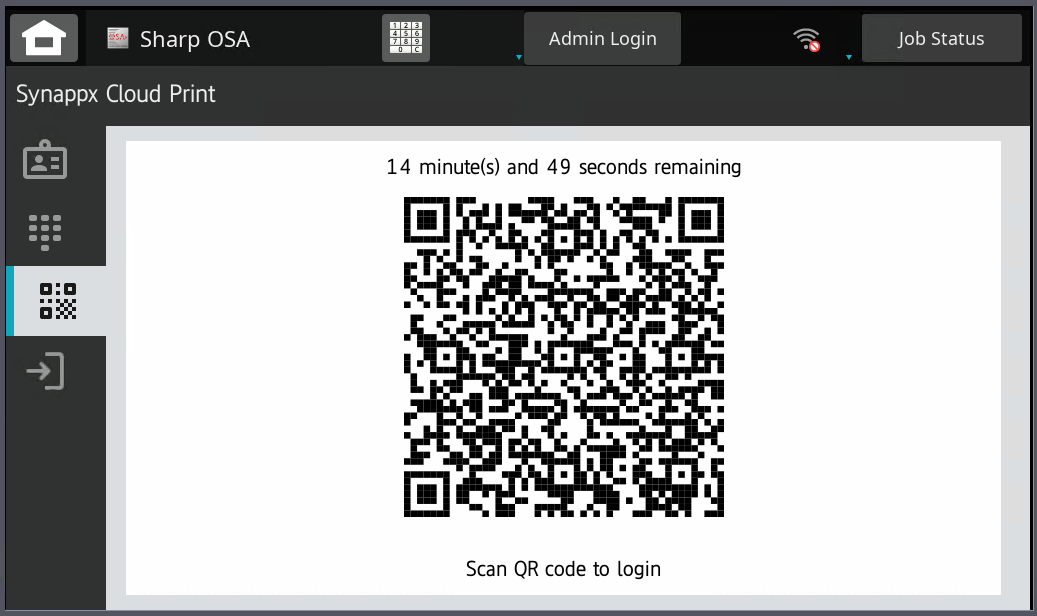
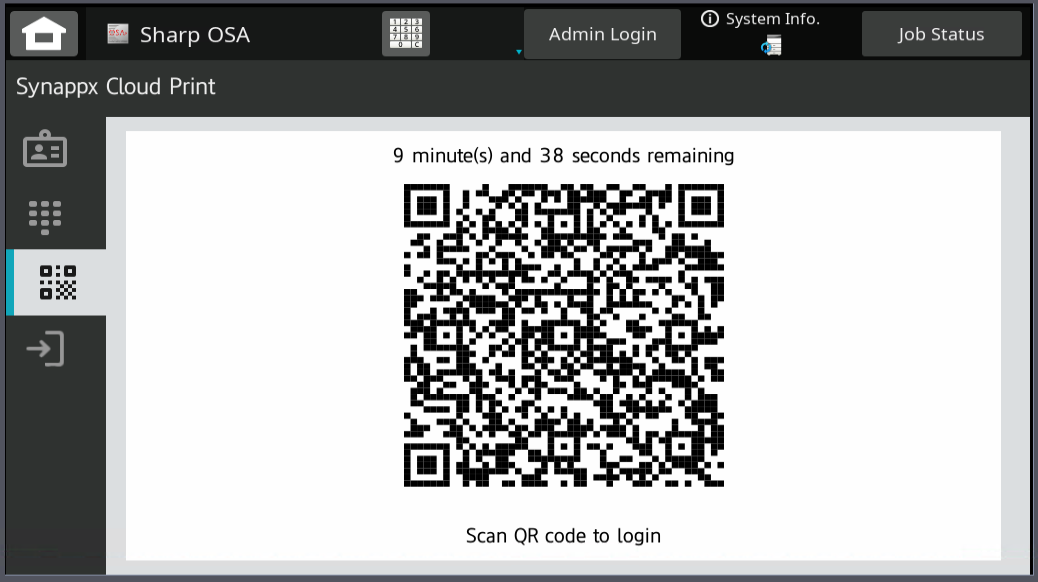
At this point, the MFP will have rebooted and will display the Synappx Cloud Print QR Code and menu items on the main screen [View Image].
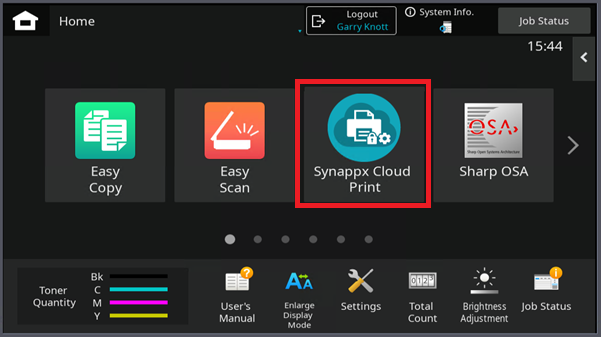
Step 6. Add a Standard OSA Application button to the MFP native screen
For convenience, it is recommended to add an additional button to the MFP native screen that will assist users in getting back to Synappx Cloud Print [View Image].
Go back into the MFP admin pages.
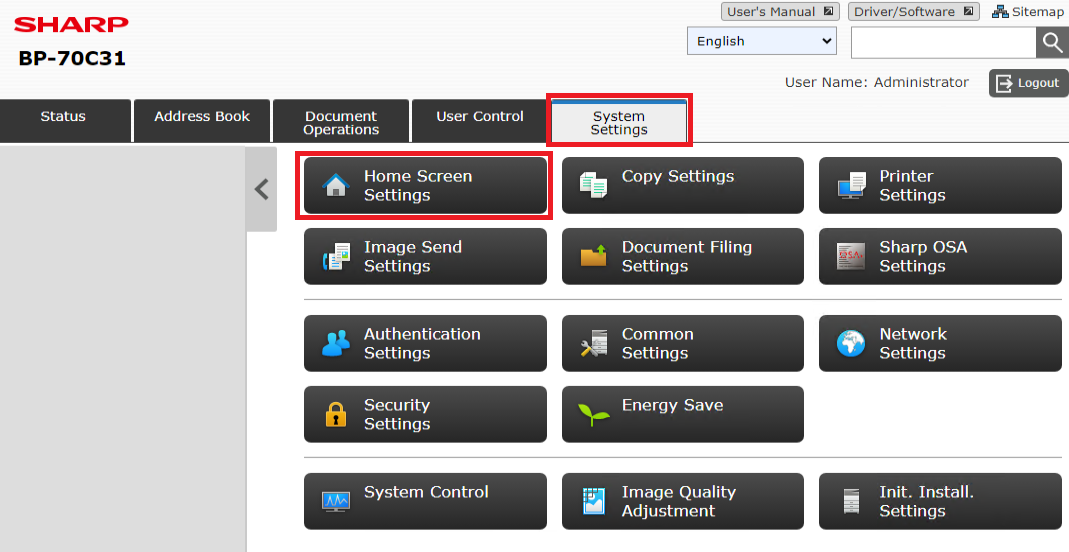
Select System Settings – Home Screen Settings [View Image].
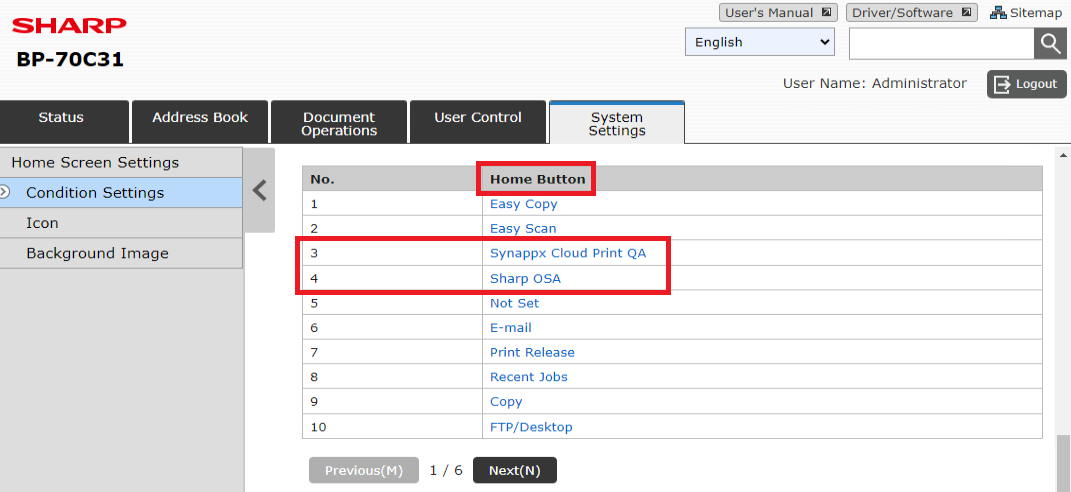
Select one of the first four entries that is either free or that you would like to use [View Image].
Once you click one of the home screen entries, you will see the Home Screen Registration Screen
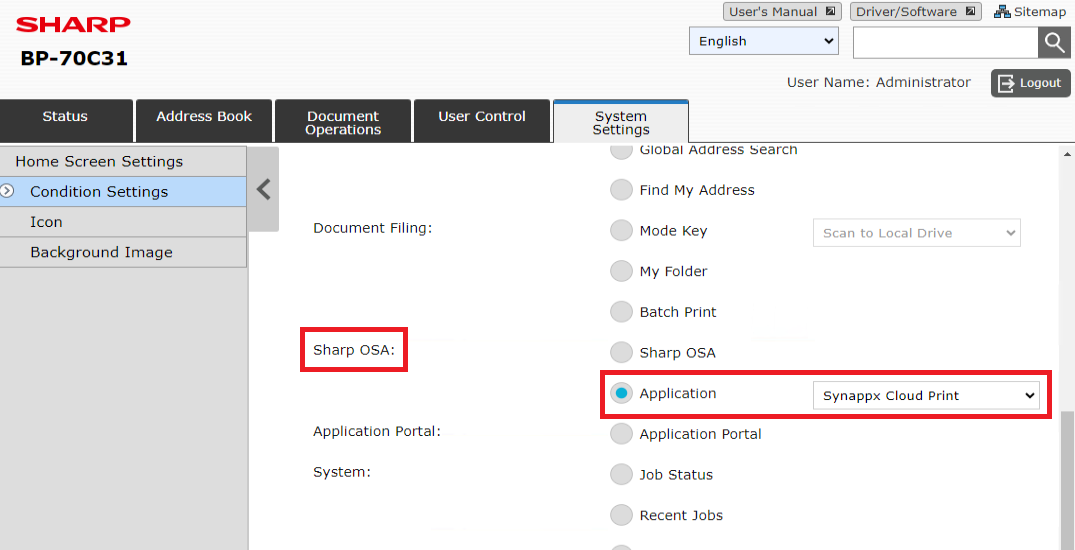
Scroll down until you see the Sharp OSA section
From there, next to Application, select Synappx Cloud Print [View Image] [View Image].