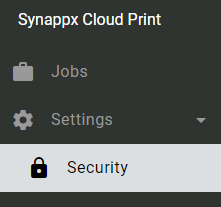
When a Synappx Cloud Print User logs into the Portal, they are able to see the following screens [View Image]:
- Jobs
- Security - Pin Login
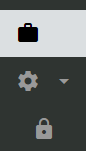
The user is able to minimise the menu by using the [Hide] icon [View Image][View Image].
Jobs
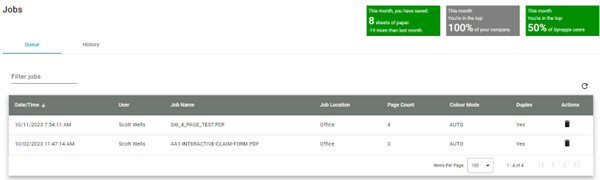
The Jobs page displays a list of currently available queued print jobs [View Image].
There are a number of user actions against jobs available:
- List jobs
- Delete Jobs
- Search jobs
- Job History
Job Queue
The Job Queue displays current jobs that have been submitted but not yet printed. These are [View Image]:
- Date / Time
- User
- Job Name
- Job Location
- Page Count
- Colour Mode
- Duplex
To the right of each job, under “Actions,” is a waste bin icon. Clicking this will delete the job from the queue, (and will also remove the job from the users Client) [View Image].
When you delete a Job you are given a “sustainable” message [View Image].
Job History
The Job History tab lists all jobs that have passed through the system, including finished, cancelled, or deleted jobs. All Print, Scan and Copy jobs are included in history. [View Image].
As with the Job Queue, jobs can be ordered by clicking on the appropriate column, which includes:
- Date / Time
- User
- Job Name
- Job Location
- Status
Filtering Jobs
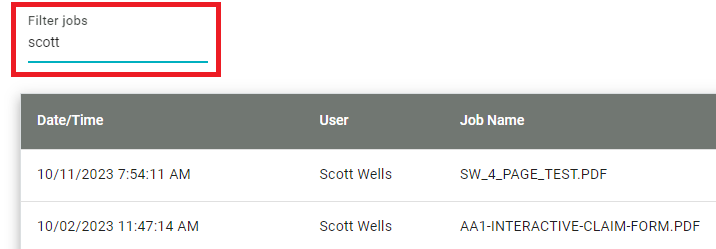
On both Job Queue and Job History pages there is an option for filtering jobs [View Image].
Once text entry begins, the jobs are filtered to display only those jobs that match any part of the string entered.
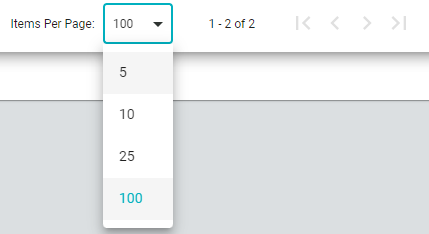
Items Per Page can be set on Job Queue and Job History pages to show that number of jobs per page. The setting is remembered on the next page visit [View Image].
You can switch between multiple pages by using the left, right, start and end icons next to the Items Per Page setting.
On both Job Queue and Job History pages you are presented with your current “Green” credentials [View Image].
PIN Login
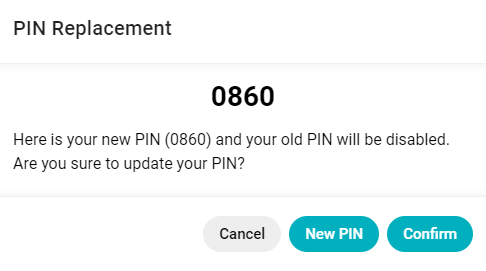
From Settings – Security the user is able to change their PIN for PIN login on the MFP.
Clicking the Replace button will give the logged in user a choice of up to five different randomly generated PIN numbers [View Image].
If the number shown is not acceptable the New PIN button can be used to select another PIN, (up to five tries) [View Image].
Clicking Confirm will confirm that PIN number for the admin / user.
Logout
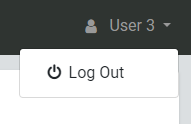
The user can logout by clicking the Logout button [View Image].