Note: Before you can login to the Administrator Portal you must have received a “Welcome” E-Mail in which you are requested to select your provider, (Google Workspace or Microsoft 365). After you have made a selection, you will receive a confirmation E-Mail with the link to login to the Administrator Portal.
Login to the Synappx Cloud Print Portal as an Admin [View Image].
Note: Before searching for devices, ensure that you are running the Windows Client App on a PC on the same network as your MFPs and are logged in to that as the same admin user that is logged in to the Admin Portal.
To discover MFPs on the network click.
Devices then Start MFP Search [View Image] [View Image].
![View Image]](/sites/default/files/2023-10/Login_to_portal_add_mfp_to_tenant%20%282%29.png)
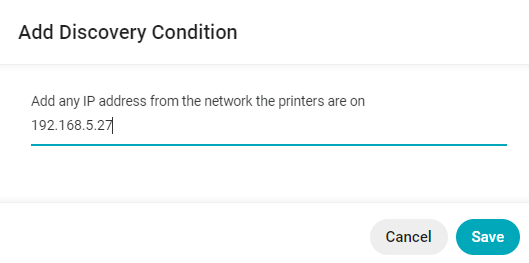
Enter a local MFP IP Address [View Image].
Click Save.
To search a subnet leave the last octet as zero, E.G. 192.168.5.0.
The MFP search has begun and you will shortly see a list of MFPs discovered on the network. Check the box to the left of your chosen MFP, click Activate Device and the device will show as “Licensed” [View Image].